Dimensional Cards: Foam Adhesive, Raised Layers and Shadow
How to add real depth to a handmade card with foam adhesive, homemade spacers, curled paper and a raised window frame, without any pop-up mechanics.

Tutorial at a glance
Materials
- Folded card base and a mat or panel
- Foam squares or foam strips, or scraps of cardstock or corrugated card for homemade spacers
- Lighter cardstock for the focal piece
- Liquid glue
- Scissors
- Pencil for curling petals and leaves
- Craft knife, metal ruler and cutting mat for the window card
Dimensional cards get their depth from height rather than from moving parts. A paper flower that sits a little above its panel throws a real shadow, and that shadow does more for a simple design than another color or another layer of flat paper would.
The methods are few. You can lift a piece on foam adhesive or a homemade spacer, shape the paper itself so it curves away from the card, or glue only part of a shape so its edges stand free. Each is described below, along with a window card that puts a raised frame to work.
How foam adhesive raises a layer
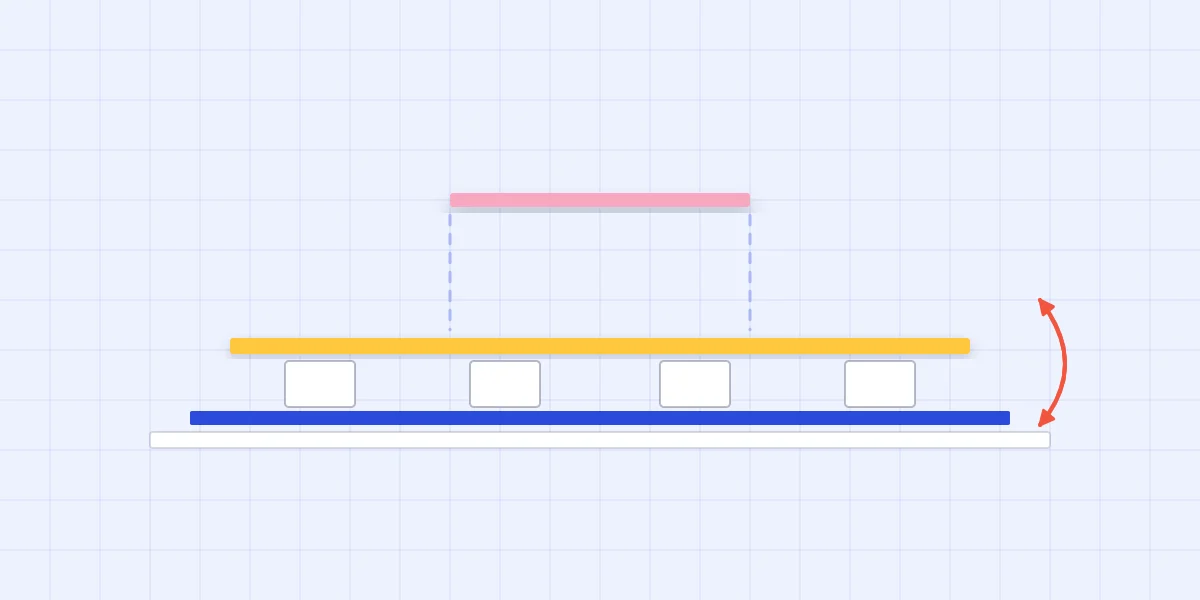
Foam squares and foam strips are small pieces of soft foam with adhesive on both faces, usually somewhere around 1/16 to 1/8 in (2 to 3 mm) thick. Stick one face to the back of the piece you want to lift, peel the liner from the other face, and press the piece onto the card. The foam holds the paper away from the surface below, leaving a gap that light cannot reach. That dark gap is the shadow.
The usual build keeps everything flat except the top piece. The mat is glued straight to the card base, then the foam goes on the mat and the panel or focal piece rests on the foam. Raising every layer makes the card thick without making it look deeper, because depth only reads when something raised sits next to something flat. If you are still working out mat sizes, the guide to layering cardstock with even borders covers the flat part of the stack.
Foam grabs on contact and does not slide, so hold the piece just above the card, line up one edge, and lower the rest only when the position looks right.
Homemade spacers that do the same job
You do not need to buy foam. Anything flat, light and a little thick will hold a layer up as long as you can glue both sides of it.
| Spacer | Lift | Good for |
|---|---|---|
| Foam squares or strips | Medium, slightly springy | Focal pieces and panels of any size |
| Two or three cardstock scraps glued in a stack | Low and firm | Small shapes, a subtle shadow, cards that will be mailed |
| Corrugated card from a shipping box | High | One bold focal piece on a hand-delivered card |
For a cardstock stack, glue small scraps of about 1/2 in (1.3 cm) on top of each other with liquid glue and let them dry fully before use, so the stack does not slip sideways under the panel. Cut corrugated card with scissors rather than tearing it, and keep the pieces well inside the edge of the shape they support so the ridges stay hidden.
Raise only the focal piece
The simplest dimensional card is a flat card with one raised element: a heart, a balloon, a star, a flower. Choose the piece the eye should land on first and lift that one alone. Everything around it stays glued flat and becomes the background the shadow falls on.
Two heights give more depth again. Put a single layer of foam under the back shape and a double layer, one square stuck on another, under the front shape. Three balloons work well this way: one flat, one on single foam, one on double.
Tip
Trim foam squares with scissors to fit narrow shapes such as stems and strings. Foam that peeks out past the paper edge looks like a white mistake from the side.
Where to place foam so panels do not sag
A small shape needs one or two squares. A full panel needs a plan. Cardstock is flexible, and a panel held up only at its four corners will dip in the middle as soon as anything presses on it. The dip stays.
Place foam at all four corners, along each edge between the corners, and in the center. On an A2 panel of 3.75 x 5 in (9.5 x 12.7 cm) that means roughly nine to twelve squares, or strips run around the edge with a few squares in the middle. Keep the foam about 1/8 in (3 mm) in from the edge so it is hidden but still supports the border.
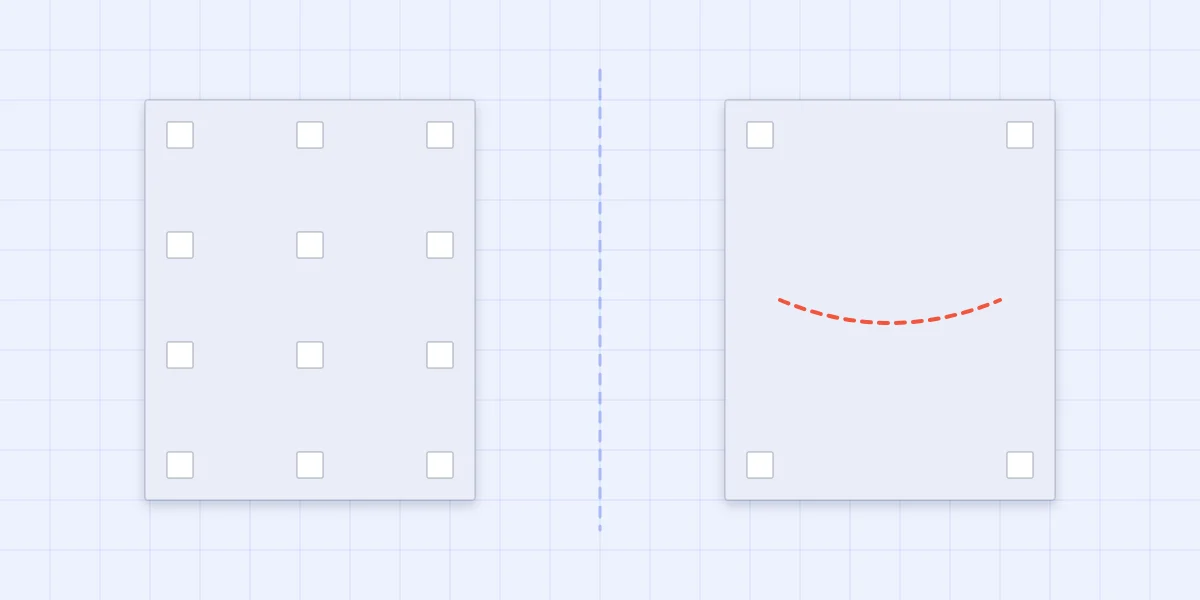
Curled petals and partly glued shapes
Paper can lift itself. Wrap a petal or leaf around a pencil, hold it for a moment and let go: the tip now curves up off the card. Curl gently, because a hard pull across the grain leaves a crease instead of a curve. Lighter cardstock, roughly 160-220 gsm, curls more easily than the heavy stock used for card bases.
Partial gluing pairs well with curling. Put glue only on the base of each leaf or the center of each petal layer and leave the tips free. The layered paper flower thank-you card uses exactly this. Use liquid glue here, since a glue stick rarely holds such a small contact area for long.
A simple window card with a raised frame
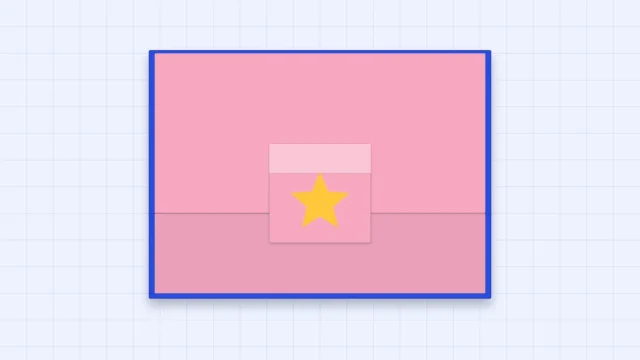
A window, also called an aperture, turns the whole card front into a shadow box. On an A2 card of 4.25 x 5.5 in (10.8 x 14 cm), cut a panel of 4 x 5.25 in (10.2 x 13.3 cm) and mark a rectangle about 2.5 x 3.5 in (6.4 x 9 cm) in its center. Cut the rectangle out with a craft knife and metal ruler on a cutting mat. A craft knife is an adult tool: cut away from the hand that holds the ruler.
Glue a small scene flat on the card base where the window will sit, such as a single star or three tiny hearts. Then run foam strips around the back of the frame, close to both the outer edge and the window edge, and press the frame onto the base. The scene now sits in a shallow recess. The handwritten greeting goes inside the card or on the frame below the window.
Mailing a thick card
Raised layers can be crushed and can make an envelope too tight. Measure the finished card with its extra thickness and make an envelope cut slightly larger, or use a padded one.
Watch out
Thick or rigid cards can cost more to send than flat ones. Check with your postal service before mailing, and choose low cardstock spacers over tall foam for cards that have to travel.
Frequently asked questions
What can I use instead of foam squares on a card?
Glue two or three small cardstock scraps into a stack, or cut small pieces of corrugated card from a shipping box. Both lift a layer the same way foam does. Cardstock stacks give a low, firm lift, and corrugated card gives a taller one.
Why does my raised panel dip in the middle?
The panel is probably supported only at its corners. Cardstock flexes, so add foam along each edge and in the center as well. Once a panel has dipped it tends to stay that way, so it is easier to add enough support before mounting.
Can I mail a card with raised layers?
Yes, but protect it with a slightly larger or padded envelope so the raised pieces are not crushed. Thick or rigid cards can cost more to send, so check with your postal service first.