Winter Holiday Card With Cut Paper Snowflakes
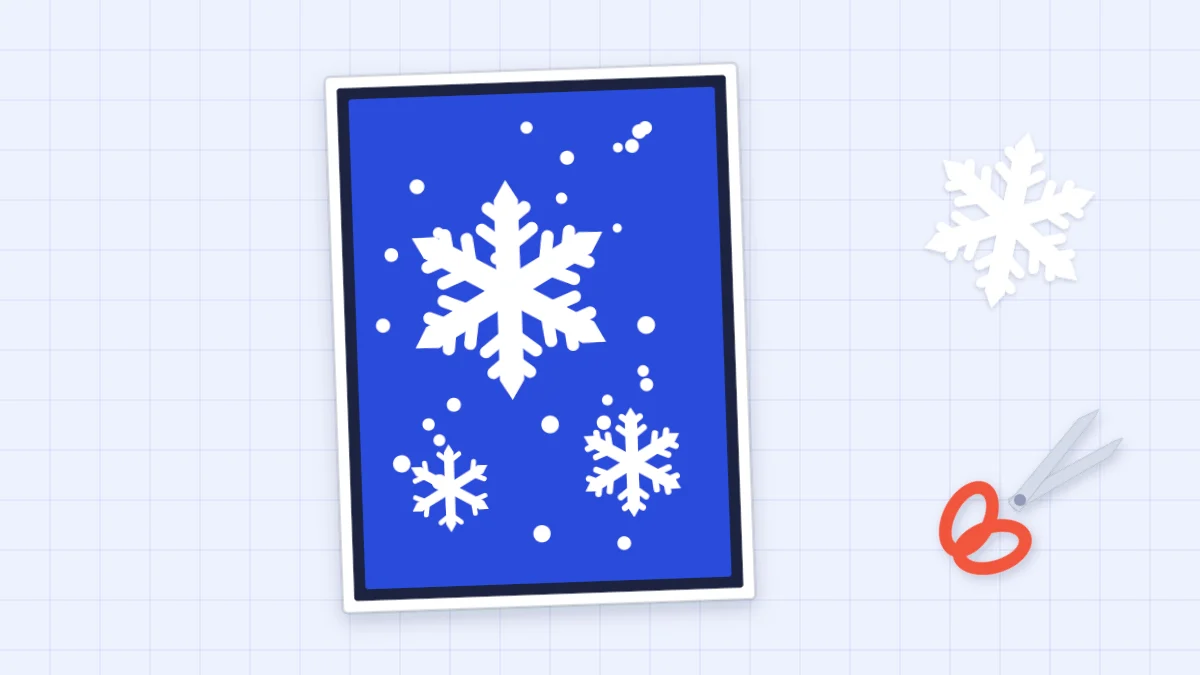
Small six-point snowflakes cut from thin white paper sit on a deep blue panel with dots of falling snow. A winter card that suits any December holiday or a new-year greeting.
Tutorial at a glance
Materials
- White card base, 8.5 x 5.5 in (21.6 x 14 cm)
- Navy cardstock mat, 4 x 5.25 in (10.2 x 13.3 cm)
- Cobalt blue cardstock panel, 3.75 x 5 in (9.5 x 12.7 cm)
- Thin white paper such as printer paper
- Small sharp scissors and a pencil
- A drinking glass and a bottle cap to trace
- Liquid glue and a toothpick
- Hole punch or white pen for snow dots
- A heavy book for pressing
White flakes on a deep blue panel make a paper snowflake card that suits any December holiday, a new-year greeting or a plain winter hello. There is nothing religious or seasonal-specific in the design, only snow, so one batch of cards can go to everyone on the list. The message is handwritten inside.
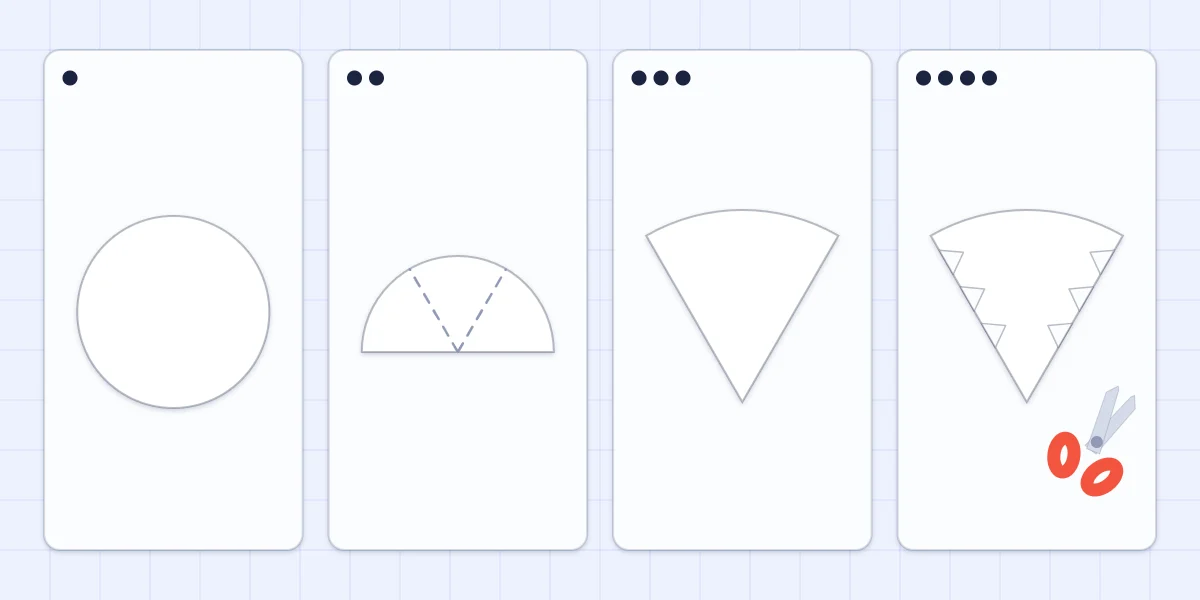
Each flake starts as a small circle of thin paper, folded into a wedge and notched with scissors. Real snow crystals have six arms, and the fold used here gives six: the circle is folded in half, then the half is folded in thirds. Folding in quarters gives four or eight points, which looks more like a doily than a snowflake.
What you need
- One white A2 card base: 8.5 x 5.5 in (21.6 x 14 cm), scored and folded to 4.25 x 5.5 in (10.8 x 14 cm)
- Navy cardstock for the mat, 4 x 5.25 in (10.2 x 13.3 cm)
- Cobalt blue cardstock for the panel, 3.75 x 5 in (9.5 x 12.7 cm)
- Thin white paper, such as ordinary printer paper
- Small, sharp scissors and a pencil
- Round things to trace: a drinking glass and a bottle cap
- Liquid glue and a toothpick
- A hole punch, or a white pen, for the snow dots
- A heavy book for pressing
Half a US letter sheet makes the base, and half an A4 sheet gives a very similar card. The mat is only 1/4 in (6 mm) larger than the panel, so the navy shows as a thin line; accurate cutting matters, and the guide to cutting cardstock cleanly will help.
Why the paper has to be thin
Once the circle is folded, the scissors have to go through six layers at once, and the layers are packed tightly near the tip of the wedge. Cardstock folded that many times is too thick to cut cleanly. The blades slip, the layers shift, and the creases crack. Thin paper folds into a flat wedge and cuts like a single sheet.
| Paper | Folds flat? | Cuts through six layers? | Use it for |
|---|---|---|---|
| Printer paper | Yes | Yes | The snowflakes |
| Lighter cardstock | Poorly | With difficulty, edges ragged | Layers and mats |
| Heavy cardstock | No, the creases crack | No | Card bases |
The cardstock does its work elsewhere on this card, as the base and the two blue layers. For more on which weight suits which job, see the guide to cardstock for card making.
Folding and cutting the snowflake
Make the large flake first. Trace a drinking glass to get a circle about 2.5 in (6.4 cm) across and cut it out.
- Start with the circle. Check that it is reasonably round. A lopsided circle gives arms of different lengths.
- Fold it in half. Bring one edge over to meet the other and crease, making a semicircle.
- Fold the semicircle in thirds. Find the middle of the straight edge. Fold the right-hand third across the center, then fold the left-hand third over it, so the semicircle becomes a narrow wedge with the three sections stacked. Adjust until the edges line up before creasing hard.
- Cut notches from both edges. Snip small triangles and half-circles out of each long edge of the wedge. Leave paper between the notches on opposite edges, since a cut that goes all the way across cuts the flake in two.
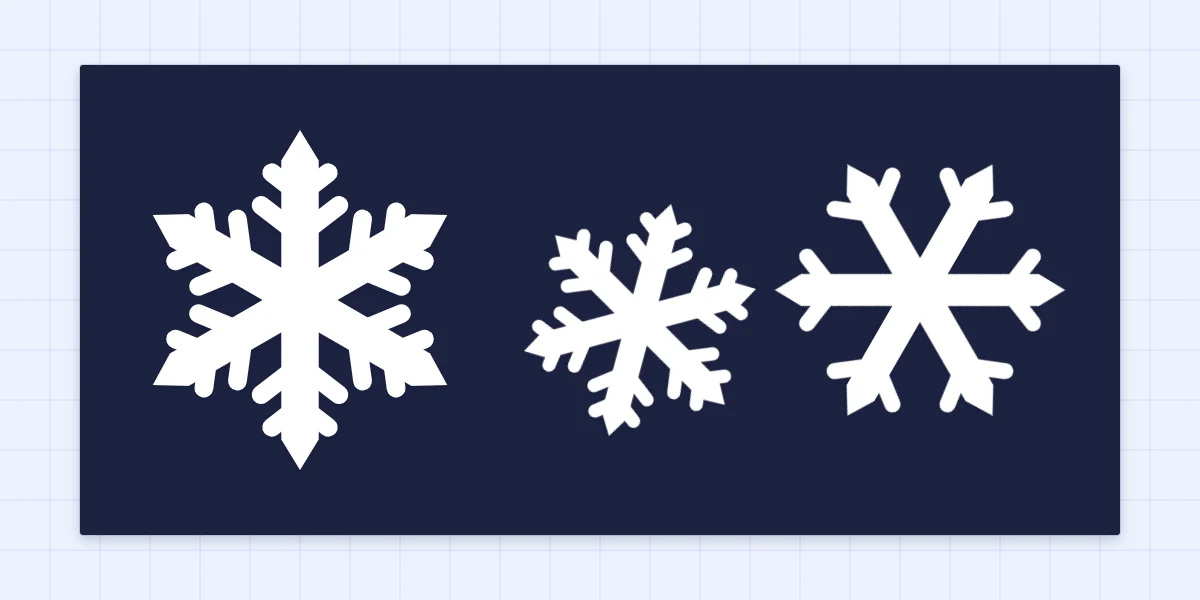
For six clear points, trim the curved end of the wedge into a single peak or a shallow V before cutting the side notches. A small snip across the very tip of the wedge makes a hole at the center of the flake. Cutting similar notches on both edges makes the six arms look alike; different notches give arms that alternate between two designs.
Make two or three small flakes the same way from circles about 1.25 in (3.2 cm) across, traced around a bottle cap.
Watch out
The cuts are tiny and the wedge is held close to the blades. Use small scissors, keep fingertips behind the cutting line, and supervise children closely or cut the small flakes for them.
Unfolding and pressing the flakes
Open each flake slowly, one fold at a time. The notches catch on each other, and a quick pull tears the thin bridges between them. If a fold sticks, ease it apart with the tip of a toothpick.
A freshly opened flake is ridged along every crease and will not sit flat on the card. Lay the flakes between two sheets of clean paper and close them inside a heavy book until the creases have relaxed.
If a flake looks heavy and blocky, refold it along its creases and cut the notches deeper.
Arranging the flakes on the panel
Place the large flake first, a little above and to one side of the center of the cobalt panel. Set the small flakes around it at different distances, so the group forms a loose triangle and not a row. Let one small flake sit close to an edge, where it looks as if it is drifting into view.
Leave open blue between the flakes; the snow dots will fill some of it.
Gluing with tiny dots
Thin paper and wet glue are a poor match: too much glue soaks through, wrinkles the flake and leaves a gray patch. Squeeze a small puddle of liquid glue onto scrap paper and pick it up with a toothpick.
- Mark each flake’s position with a faint pencil dot at its center.
- Touch one tiny dot of glue to the back of the center and one to the tip of each arm.
- Lower the flake onto the panel and press it down through a clean sheet of scrap paper, not with bare fingers.
- Repeat for the small flakes.
Adding falling snow and finishing
Punch a dozen or so dots from the white paper with a hole punch and glue them in the open areas, closer together near the top of the panel and sparser lower down. Without a punch, dot the panel with a white pen, or dip the blunt end of a toothpick in white paint.
Let the glue dry fully, then glue the cobalt panel to the navy mat and the mat to the card front. Press the finished card under the book once more. The card is nearly flat, so it fits a standard envelope, and you can cut one extra small flake to glue on the envelope flap or follow the steps for making an envelope in a matching blue.
Frequently asked questions
How do you fold paper for a six-point snowflake?
Cut a circle, fold it in half into a semicircle, then fold the semicircle in thirds so it becomes a narrow wedge. Cut notches from both long edges and shape the curved end into a point. Unfolded, the flake has six arms.
Can I cut snowflakes from cardstock?
Not with this folding method. The folded wedge is six layers thick, and cardstock at that thickness cracks along the creases and is too stiff for scissors to cut cleanly. Use thin paper such as printer paper for the flakes and keep cardstock for the base and panels.
How do I glue a delicate paper snowflake without wrinkling it?
Press the flake flat under a book first. Then apply tiny dots of liquid glue with a toothpick at the center and at the tip of each arm, and press it down through a clean sheet of paper. Spreading glue over the whole flake soaks the paper and causes wrinkles.