Simple Thank-You Card With a Layered Paper Flower
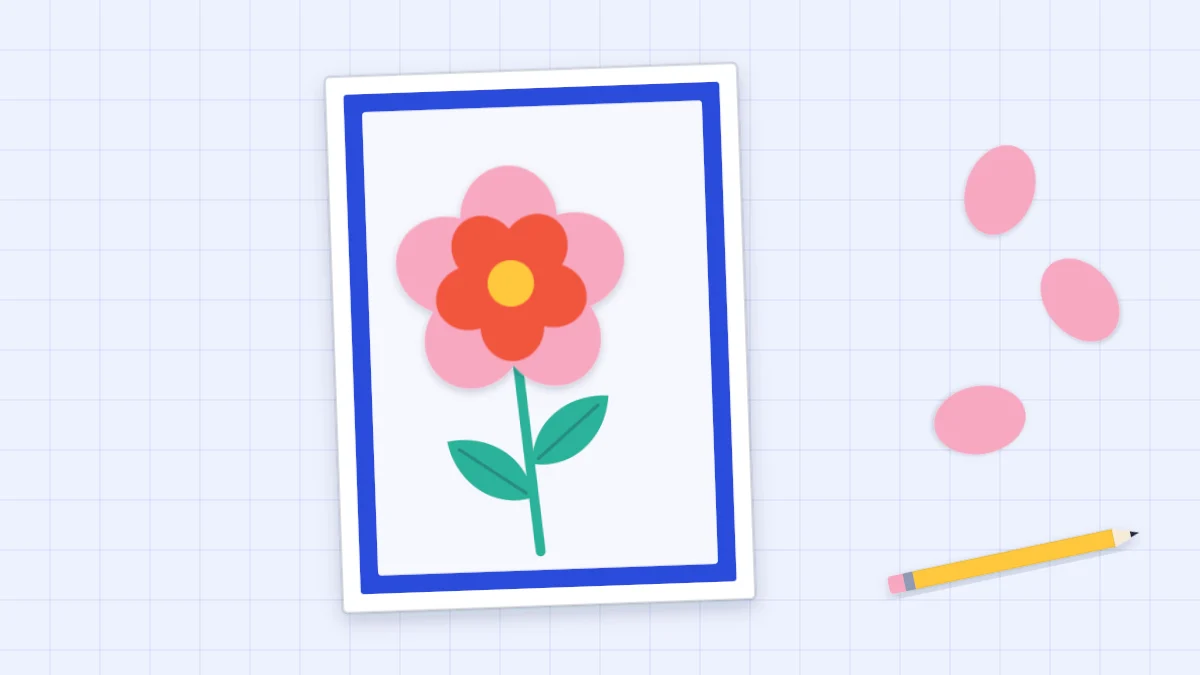
One three-layer paper flower, a thin stem and two leaves, set off-center on a matted panel. Petals are cut in a stack so they match and curled over a pencil.
Tutorial at a glance
Materials
- A2 side-fold card base in white
- Colored mat, 4 x 5.25 in, and white or pale panel, 3.75 x 5 in
- Lighter cardstock scraps in two petal colors, a center color and green
- Scissors and a pencil
- Paper clip or small binder clip
- Glue stick or liquid glue
- Foam squares (optional)
One good paper flower is all a simple thank-you card needs. This one is built from three layers, a ring of five large petals, a ring of five smaller petals and a round center, on a thin stem with two leaves. It sits off-center on a matted panel so there is clear space beside it for a few handwritten words.
No punch or template is needed: the petals are cut freehand in a small stack so they match.
What you need
- One A2 side-fold card base in white, 4.25 x 5.5 in (10.8 x 14 cm) when folded
- A colored mat, 4 x 5.25 in (10.2 x 13.3 cm), and a white or very pale panel, 3.75 x 5 in (9.5 x 12.7 cm)
- Lighter cardstock scraps in two petal colors, one center color and one green
- Scissors and a pencil
- A paper clip or small binder clip
- A glue stick or liquid glue
- Foam squares (optional)
The base is half a US letter sheet, scored and folded; half an A4 sheet makes a very similar card. Cut the petals from lighter cardstock, roughly 160-220 gsm. It curls without cracking, and five layers of it can still be cut together with ordinary scissors.
Cut petals that match
Petals cut one by one drift in size, and a flower with one fat petal looks lopsided. Stacking fixes that.
- Cut five small rectangles of the first petal color, each about 5/8 x 1 in (1.6 x 2.5 cm). Cut five of the second color, each about 1/2 x 5/8 in (1.3 x 1.6 cm).
- Stack the five large rectangles with their edges even and clip them together at one short end.
- Starting at the clipped end, cut a petal through all five layers: narrow at the base, widening to a rounded tip at the free end, like a long teardrop with a flat bottom. Cut up one side, around the tip and down the other in one pass, then remove the clip.
- Repeat with the five small rectangles.
If the stack slides or the scissors struggle, cut a stack of three and a stack of two, using a petal from the first stack as a pattern for the second. Then cut the rest of the pieces:
| Piece | How many | Suggested size | Shape |
|---|---|---|---|
| Large petals | 5 | About 1 in (2.5 cm) long, 5/8 in (1.6 cm) wide | Rounded tip, narrow base |
| Small petals | 5 | About 5/8 in (1.6 cm) long, 1/2 in (1.3 cm) wide | Same shape, smaller |
| Center | 1 | About 1/2 in (1.3 cm) across | Circle |
| Stem | 1 | 1/8 x 2.5 in (0.3 x 6.4 cm) | Straight strip |
| Leaves | 2 | About 3/4 in (1.9 cm) long | Pointed oval |
For the center, trace around a small coin or a pen cap.

Curl the petals over a pencil
Flat petals look like a diagram; curled ones look like a flower. Hold a petal by its base, lay the tip across a round pencil with your thumb on top, and pull the petal through gently so the tip rolls back over the pencil. One pass gives a soft curve. A second pass tightens it.
Curl only the outer half of each petal and leave the base flat, because the base is the part that gets glued. Curl the large petals more than the small ones, so the two rings read as separate layers.
Watch out
Pulling too hard, or using heavy cardstock, leaves a sharp crease across the petal instead of a curve. Test on an offcut of the same paper first, and switch to a thicker pencil or marker barrel if it creases.
Assemble the flower
Build the flower on a small scrap circle, about 3/4 in (1.9 cm) across, instead of directly on the panel. It becomes a single piece that you can move around before committing to a position, and raise on foam if you like.
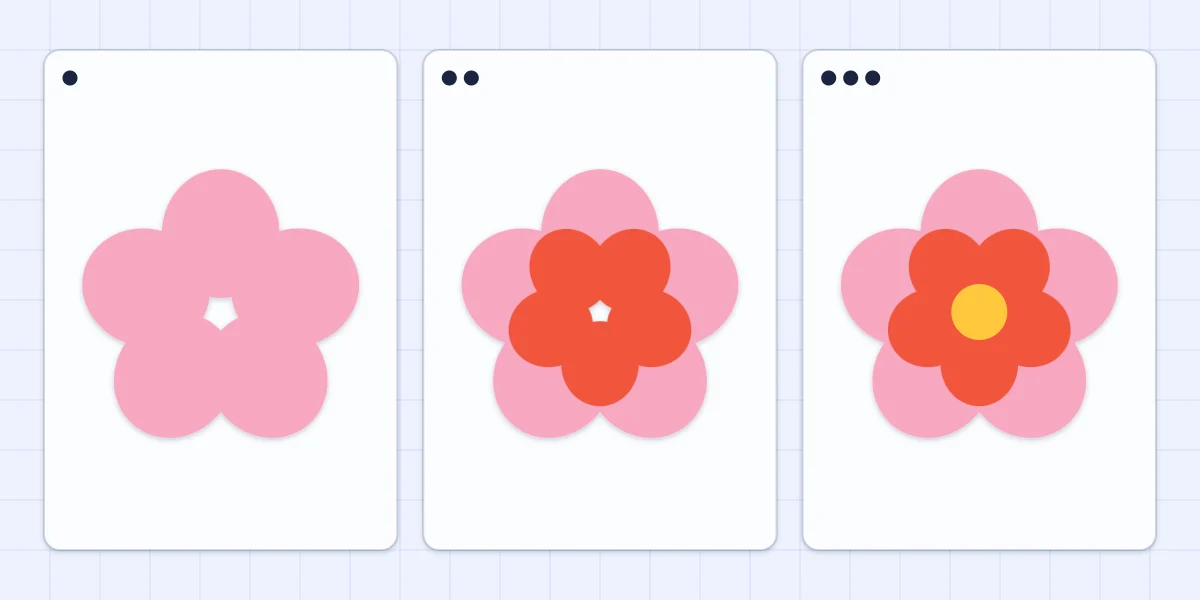
- Glue the large petals in a ring. Put glue on the scrap circle and set the five petal bases on it, tips pointing outward, evenly spaced like the points of a star.
- Add the small petals, offset. Glue each small petal over the gap between two large ones, so the lower ring shows between the upper petals.
- Add the center. Glue the circle over the point where all the bases meet. It hides every rough end.
Let the glue dry fully before handling the flower.
Place the flower off-center
Mount the panel on the mat first, with an even border of 1/8 in (3 mm); the guide to layering cardstock explains how to keep that reveal straight. Then lay the flower, stem and leaves on the panel without glue.
A placement that works well: the flower center about one third of the way in from the left edge and one third of the way down from the top. The stem runs from behind the flower toward the bottom edge with a slight lean, and the two leaves attach at different heights, one on each side. That leaves the lower right of the panel open for the greeting.
Glue the stem first, then the leaves by their bases only so the tips lift, then the flower over the top of the stem. For more depth, put one or two foam squares behind the scrap circle. The guide to dimensional cards covers homemade spacers if you have no foam adhesive.
Tip
Choose either curled petals or foam if the card will be mailed. Thick cards can cost more to send; check with the postal service.
What to write
A short, specific message beats a long general one. Three parts are enough:
- Name the gift or the help. Say what it was, not just “the gift”.
- Add one specific detail. Where it is now, how you used it, or what the help made possible.
- Close warmly. A line about seeing or speaking to the person soon.
Write two or three words on the front in pencil first, go over them with a fine-tip pen, and put the longer message inside.
Variations
Swap the colors and the flower changes character: two shades of one color look soft, while a dark center on pale petals looks bold. Six narrower petals per ring give a daisy shape.
If leaves appeal more than petals, the botanical thank-you card uses the same lifted-tip idea for a wreath. A raised flower also needs a little room in its envelope, and making your own envelope lets you size it to fit.
Frequently asked questions
How do I cut paper petals that are all the same size?
Stack the paper pieces, clip them together at one end and cut the petal shape through all layers at once. If five layers are too thick for your scissors, cut a stack of three and a stack of two, using a finished petal as the pattern for the second stack.
How do I curl paper petals without creasing them?
Hold the petal by its base, lay the tip over a round pencil with your thumb on top and pull gently so the paper rolls around the pencil. Use lighter cardstock and light pressure. If the petal creases, try a thicker pencil or a marker barrel.
What should I write in a thank-you card?
Name the gift or the help, add one specific detail about how you used it or what it meant, and close with a warm line. Two or three sentences written by hand are enough.