How to Make an Envelope for Any Handmade Card
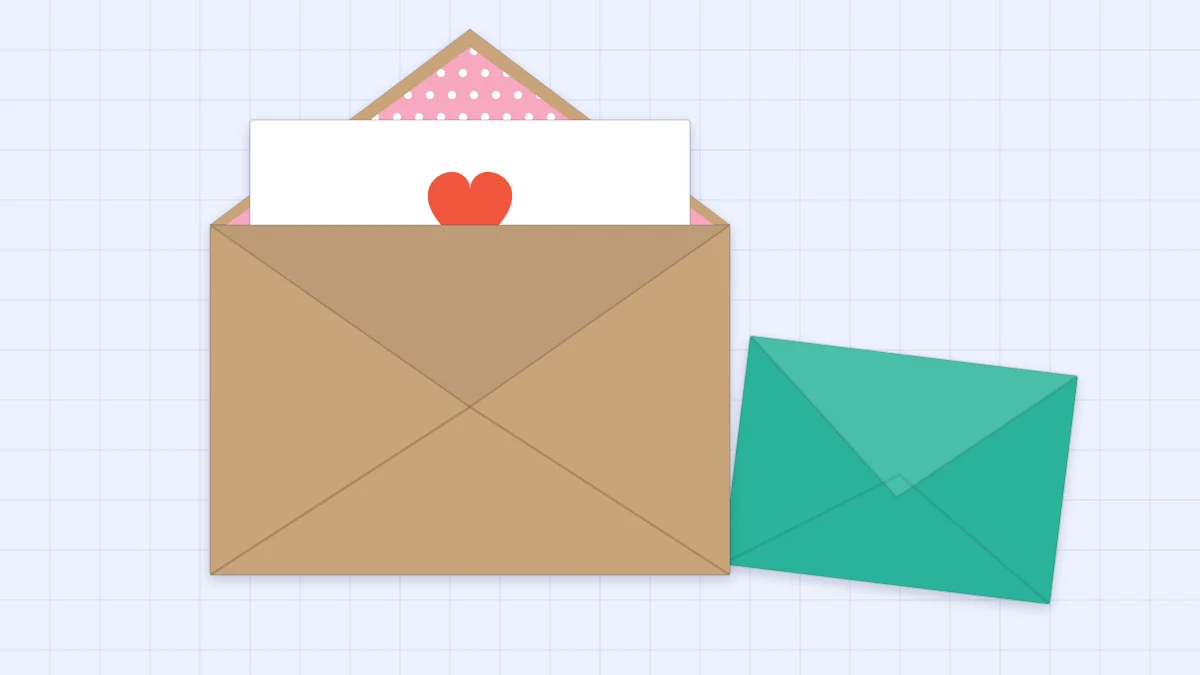
Fold a custom envelope from one square of paper using the card itself as the template, then trim the points, glue the pocket and add a liner.
Tutorial at a glance
Materials
- Square of light paper, roughly 90-120 gsm
- The finished card, used as the template
- Ruler and pencil
- Scissors or a paper trimmer
- Bone folder or the back of a spoon
- Glue stick
- Patterned paper scrap for a liner (optional)
- Paper sticker for sealing (optional)
You can make an envelope for any handmade card from a single square of paper, four folds and a little glue. The method works for every size because the card itself is the template: you fold the paper around it, so the fit is right even for a card with unusual proportions.
That matters because handmade cards often end up slightly bigger, thicker or squarer than the envelopes sold in packs.
What you need
- A square of light paper (sizes below)
- The finished card
- A ruler and pencil
- Scissors, or a paper trimmer for the straight cuts
- A bone folder, or the back of a spoon, for sharp creases
- A glue stick
- Optional: a scrap of patterned paper for a liner and a paper sticker for sealing
Choose paper lighter than cardstock
An envelope has thick spots where three layers overlap, so the paper needs to fold flat without springing back. Text-weight paper of roughly 90-120 gsm is a good range: printer paper, kraft wrapping paper, plain gift wrap or light patterned paper all work. Cardstock is too stiff: its folds stay bulky and the flaps pop open.
Very thin paper has the opposite problem: it shows the card through the front and tears at the corners.
Size the square for your card
Turn the paper so that one corner points toward you, like a diamond, and lay the card across the middle with its long edges running left to right. The square is big enough when every corner of the card sits about a finger-width inside the edge of the paper. With less, the flaps will not cover the card.
As a check with a ruler, the square measured from corner to corner should be about the width of the card plus its height plus 1.5 in (4 cm).
| Card | Card size | Paper square |
|---|---|---|
| A2 | 4.25 x 5.5 in (10.8 x 14 cm) | About 8 in (20 cm) |
| Half-A4, A6-style | 10.5 x 14.8 cm | About 8.25 in (21 cm), the short side of an A4 sheet |
| 5.5 in square | 5.5 x 5.5 in (14 x 14 cm) | About 9 in (23 cm) |
| A7 | 5 x 7 in (12.7 x 17.8 cm) | About 9.5 in (24 cm) |
For an A2 card, a US letter sheet is all you need. Fold one short edge over until it lies along the long edge, crease, and cut off the strip that is left over. Unfolded, that gives an 8.5 in (21.6 cm) square, which makes a slightly roomy envelope, or you can trim it to 8 in for a closer fit. Larger cards need a bigger sheet, such as a 12 x 12 in paper or a piece cut from a roll. If your cuts tend to wander, see the guide to cutting straight, square edges.
Tip
A card with foam layers or other raised parts needs extra room. Add another finger-width to the square for dimensional cards so the envelope closes without pressing on them.
Folding the envelope
Make all four folds dry first, with the card in place and no glue. Put the paper face down if it has a pattern, so the pattern ends up on the outside.
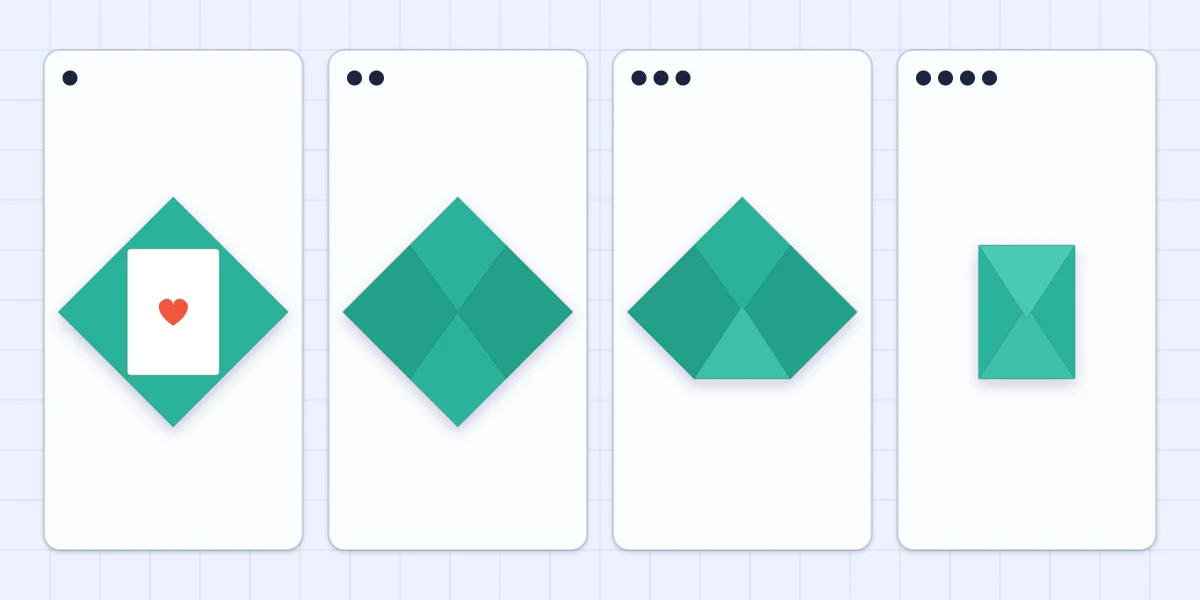
- Position the card. With the square turned as a diamond, center the card on it, long edges left to right. The paper points showing left and right of the card should match, and so should those above and below.
- Fold the two side corners in. Bring the left corner over the card and crease along the card’s short edge, then do the same on the right. Leave a hair of slack, about 1/16 in (2 mm), between each crease and the card so it slides in and out easily.
- Fold the bottom corner up. Bring the bottom point up over the side flaps and crease along the lower edge of the card. This flap forms the pocket, and its slanted edges should lie on top of the side flaps.
- Fold the top corner down. Bring the top point down over everything and crease along the upper edge of the card. This closing flap should overlap the bottom flap so it can be sealed.
Run a bone folder along each crease. If the envelope looks crooked, the card slipped during step two: open everything, re-center and fold again.
Trim the points and glue the pocket
Open the top and bottom flaps and slide the card out. Three small cuts make it neater:
- Snip about 1/2 in (1.3 cm) off the tip of each side flap so the tips do not stack into a lump in the middle.
- Cut the tip of the bottom flap straight across so it hides under the closing flap.
- Round the tip of the top flap by drawing around a coin and cutting along the curve.
Now glue. Fold the side flaps back in. Run a narrow line of glue stick along the two slanted edges of the bottom flap, on the side that will face the side flaps, then fold it up and press along both edges.
Watch out
Keep glue away from the center of the bottom flap. That part lies directly over the pocket, not over a side flap, and glue there sticks the envelope shut or sticks the card to it.
Let the glue dry fully before the card goes back in.
Adding a liner
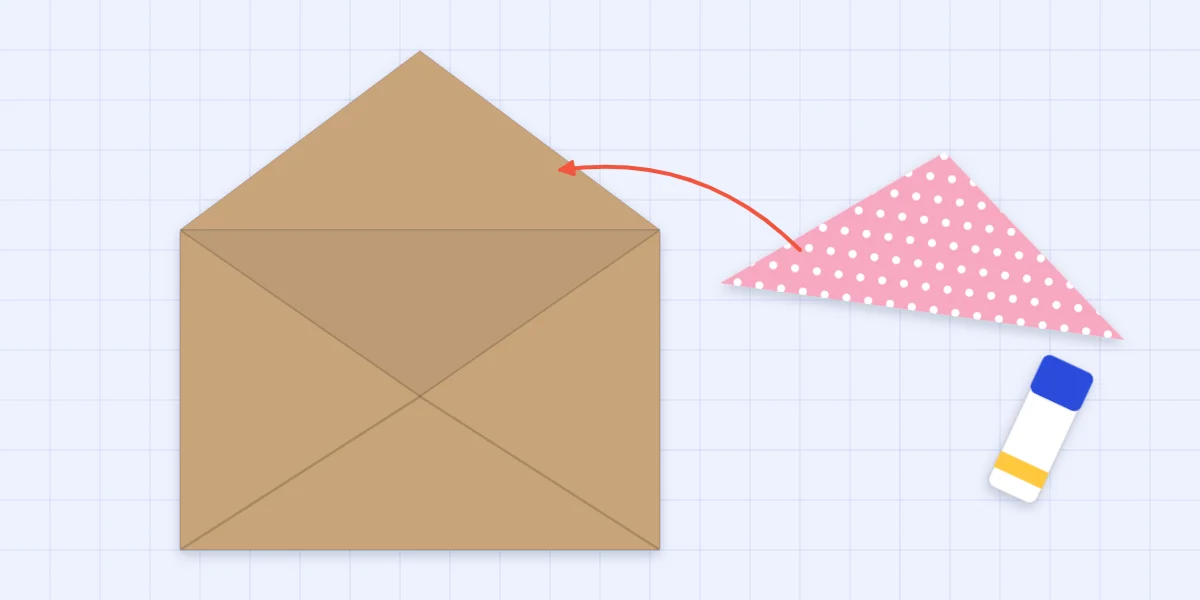
A liner is a piece of patterned paper glued inside the closing flap, so a flash of color shows when the envelope is opened. With the flap open, lay it on the back of the patterned paper and trace its two slanted edges and the fold line. Cut the triangle out, then trim about 1/4 in (6 mm) from the two slanted edges so a border of envelope paper remains to take the glue when you seal it.
Glue the liner down with a glue stick, smoothing from the fold toward the point. Fold the flap closed once while the glue is fresh so the liner settles at the crease instead of wrinkling later.
Sealing and sending
Seal the envelope with a glue stick along the edge of the closing flap, or with a paper sticker over the point. Pick paper and a liner that repeat a color from the card. The guide to finishing a handmade card has more on matching the two, and a matching set of thank-you cards looks complete with envelopes cut from one paper.
Square, thick or unusually sized envelopes can cost more to mail than standard ones, so check with the postal service before sending.
Frequently asked questions
What size paper do I need to make an envelope for an A2 card?
A square of about 8 in (20 cm) fits an A2 card of 4.25 x 5.5 in. You can also use the 8.5 in square cut from a US letter sheet for a slightly roomier envelope. For other sizes, lay the card diagonally on the paper and leave about a finger-width beyond each corner.
Can I make an envelope from cardstock?
It is better not to. Cardstock is stiff, so the overlapping folds stay bulky and the flaps tend to spring open. Text-weight paper such as printer paper, kraft wrapping paper or light patterned paper folds flat and holds its creases.
Where does the glue go on a folded paper envelope?
Only along the two slanted edges of the bottom flap, where it overlaps the side flaps. Glue in the center of that flap would close the pocket or stick to the card. The top flap stays unglued until you are ready to seal the envelope.