Pop-Up Birthday Card With a Stack of Gifts
Three box-fold tabs in one liner lift three paper gifts when the card opens. Follow the order cut, fold, test closed, decorate, glue, and nothing sticks out of the edge.

Tutorial at a glance
Materials
- Outer card, 8.5 x 5.5 in, scored at 4.25 in
- White liner, 8.25 x 5.25 in, scored at 4 1/8 in
- Cardstock scraps for three gifts, ribbons and bows
- Pencil and ruler
- Bone folder or the back of a butter knife
- Scissors, or a craft knife with a metal ruler and cutting mat
- Glue stick or liquid glue
This pop-up birthday card opens to show three paper gifts standing up from the center fold, each at a different height. The mechanism is the plain box fold, repeated three times in one liner. If you have not made one before, read pop-up card basics first and try a single tab on scrap paper.
The order of work matters: cut, fold, test the card closed, decorate the tabs, and only then glue the liner into the outer card.
What you need
- Outer card: heavier cardstock in a strong color, 8.5 x 5.5 in (21.6 x 14 cm), scored at 4.25 in (10.8 cm). This is half a US letter sheet; half an A4 sheet gives a very similar card.
- Liner: white lighter cardstock, 8.25 x 5.25 in (21 x 13.3 cm), scored at 4 1/8 in (10.5 cm)
- Scraps of cardstock in three gift colors, plus a contrasting color for ribbons
- A pencil, a ruler and a bone folder (or the back of a butter knife)
- Scissors, or a craft knife with a metal ruler and cutting mat
- A glue stick
Roughly 160-220 gsm suits the liner, because small creases fold cleanly in it; the outer card can be heavier.
Plan the three tabs
The card opens with its fold running along the 5.5 in (14 cm) side: one panel stands up as the back wall and the other lies flat as the floor. Each liner panel is 4 1/8 in (10.5 cm) deep from fold to edge, and that number limits everything else.
The basic rule is that tab depth must be less than the distance from the fold to the card edge. With a gift glued on, measure the whole thing. When the card closes, the gift lies flat along the floor panel, pointing toward the open edge, and reaches as far from the fold as the cut depth plus its own height. That total has to stay inside the liner.
| Tab | Tab width | Cut depth each side of fold | Gift size, width x height | Reach when closed |
|---|---|---|---|---|
| Large | 1.25 in (3.2 cm) | 1.5 in (3.8 cm) | 1.5 x 2 in (3.8 x 5 cm) | 3.5 in (8.9 cm) |
| Medium | 1 in (2.5 cm) | 1 in (2.5 cm) | 1.25 x 1.5 in (3.2 x 3.8 cm) | 2.5 in (6.4 cm) |
| Small | 3/4 in (1.9 cm) | 3/4 in (1.9 cm) | 1 x 1 in (2.5 x 2.5 cm) | 1.75 in (4.4 cm) |
Every reach is well under 4 1/8 in, which leaves room for a bow. If you change the sizes, redo that sum.
Mark and cut the tabs
- Score and fold the liner, then open it flat with the side that will be glued down facing up, so pencil marks end up hidden. The guide to scoring and folding covers getting this fold straight.
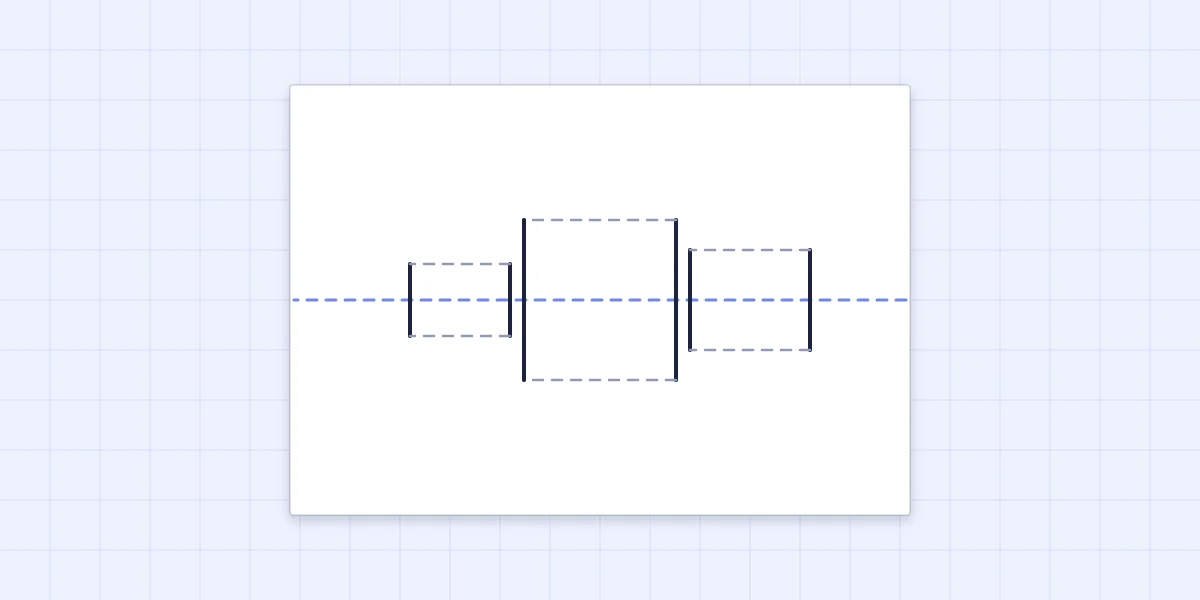
- Mark the tab positions along the fold. Starting 1/2 in (1.3 cm) from the left edge, mark the large tab, leave a gap of 1/2 in, mark the medium tab, leave another 1/2 in, then mark the small tab.
- Draw the cut lines. At each mark, draw a line at a right angle to the fold that crosses it and extends the cut depth on both sides: two parallel lines 3 in (7.6 cm) long for the large tab, 2 in (5 cm) for the medium, 1.5 in (3.8 cm) for the small.
- Cut the six lines. Use a craft knife and metal ruler on a cutting mat, or refold the liner and snip in from the fold with scissors through both layers.
- Score the tab creases. For each tab, score a line joining the two cut ends on one side of the fold, and another joining the two cut ends on the other side.
A craft knife is an adult tool: cut on the mat, with the holding hand behind the blade.
Fold the tabs and test the card closed
Turn the liner over and fold it to a right angle. Push each tab forward from behind so its center crease reverses and it stands out as a small step. Then close the liner slowly, guiding the tabs flat, and press along every crease.
Open and close it several times. Each tab should rise on its own, and nothing should show beyond the edges when the liner is shut. A tab that buckles usually has a cut that stops short of its scored crease.
Watch out
Test before decorating. If a tab is too deep, the only fix is a new liner, and a plain one is far easier to recut than one with three gifts glued to it.
Make the paper gifts
Cut three rectangles to the sizes in the table. On each one, glue two ribbon strips about 1/8 in (3 mm) wide in a contrasting color, one down the middle and one across, and trim the ends flush. For the bow, glue two teardrop loops about 1/4 in (6 mm) long point to point on the top edge, like a letter V.
The guide to card color combinations helps with matching the gifts to the outer card.

Glue the gifts to the tabs
With the liner open at a right angle, each tab has a top face and a front face. Put glue on the front face only, not on the gift, and set the gift so its bottom edge sits level with the crease where the tab meets the floor panel.
A gift that hangs below the bottom crease will jam against the floor and stop the card opening. Close the liner once more to confirm that the bows stay inside.
Glue the liner into the outer card
- Apply glue to the back of one liner panel, keeping it off the tabs and about 1/4 in (6 mm) away from the cut lines.
- Press that panel into the open outer card with the two folds nested together and an even border of 1/8 in (3 mm) showing.
- Glue the back of the other liner panel in the same way, then close the outer card onto it, so the liner finds its own position.
- Press the closed card flat, open it carefully and check that all three tabs still move.
Use a glue stick here. Liquid glue can creep behind a tab and stick it to the outer card.
Finish the front
Keep the outside quiet: one small flat gift, made the same way, placed slightly off-center. Handwrite the greeting on the floor panel in front of the gifts.
A handmade envelope can be sized with a little extra room. Thick or rigid cards can cost more to send; check with the postal service.
Frequently asked questions
Why do the gifts stick out when the card is closed?
When the card closes, each gift lies flat pointing toward the open edge. It reaches as far from the fold as the cut depth plus the height of the gift. If that total is more than the depth of the card panel, the gift shows at the edge, so shorten the gift or make a new liner with shallower cuts.
Why does a tab not pop up after the liner is glued in?
Glue has almost certainly reached the back of the tab and stuck it to the outer card. Keep glue away from the tabs and the cut lines, and use a glue stick rather than liquid glue, which spreads under pressure. If the glue is still soft, ease the tab free with the tip of a craft knife.
Can I cut the tabs directly in the card instead of using a liner?
You can, but the cuts then show as slots on the outside of the card. A separate liner glued inside an outer card hides them and also makes the card sturdier.