Easy Birthday Card With Paper Balloons
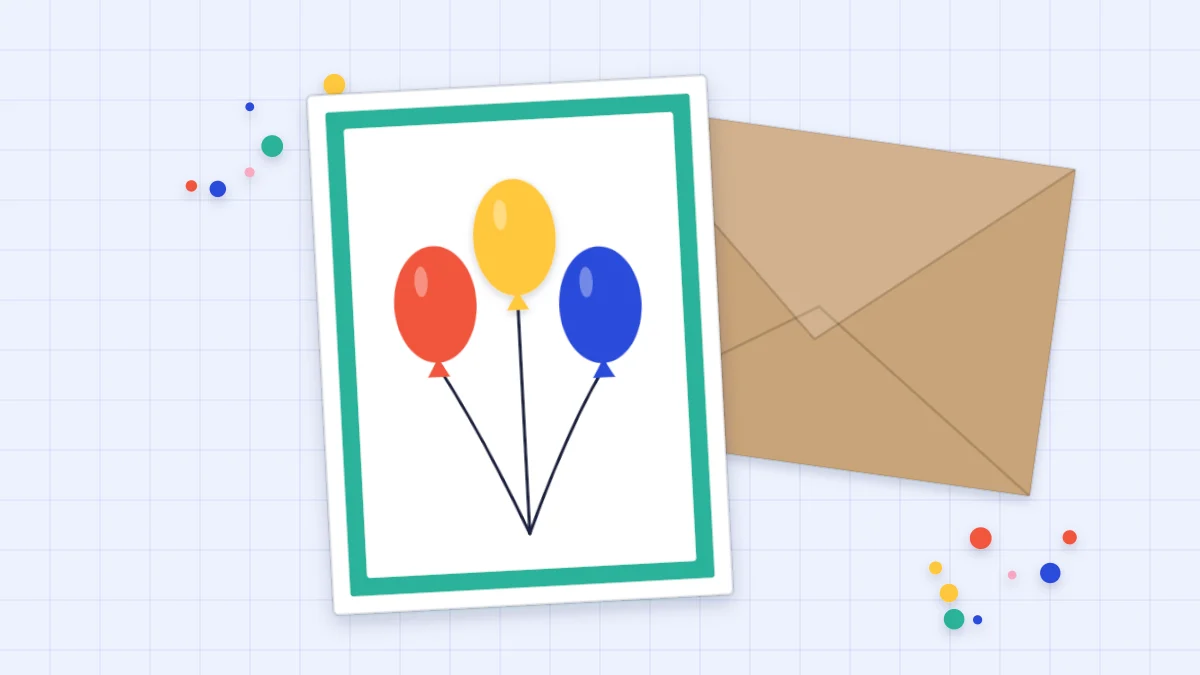
A beginner birthday card with three paper balloons cut from a folded template, strings that meet at one point and space for a handwritten greeting.
Tutorial at a glance
Materials
- White cardstock for the base, 8.5 x 5.5 in
- Colored cardstock for the mat, 4 x 5.25 in
- White cardstock for the panel, 3.75 x 5 in
- Cardstock scraps in red, yellow and blue
- Scrap of printer paper for the template
- Pencil, ruler and scissors
- Bone folder or the back of a butter knife
- Glue stick or liquid glue
- Foam squares or stacked cardstock scraps
- Fine-tip pen
Three paper balloons on a white panel make an easy birthday card that suits any age, and the whole design comes from scraps. The only shapes to cut are ovals and tiny triangles. A folded-paper template takes care of symmetry, so the balloons match.
The card is a standard A2 side-fold, 4.25 x 5.5 in (10.8 x 14 cm), with a colored mat and a white panel. The balloons float in the upper part of the panel, their strings meet at one point, and the space below is left clear for a handwritten greeting.
What you need
- White cardstock for the card base, 8.5 x 5.5 in (half a US letter sheet)
- Mint or other colored cardstock for the mat, 4 x 5.25 in (10.2 x 13.3 cm)
- White cardstock for the panel, 3.75 x 5 in (9.5 x 12.7 cm)
- Scraps of lighter cardstock in three colors, such as red, yellow and blue
- A scrap of printer paper for the template
- Pencil, ruler and scissors
- A bone folder, or the back of a butter knife, for scoring
- Glue stick or liquid glue
- Two or three foam squares, or small stacked scraps of cardstock
- A fine-tip pen for the strings and the greeting
If you work with A4 paper, half a sheet folds into a very similar A6-style card. Cut the mat and panel 1/4 in (6 mm) and 1/2 in (1.3 cm) smaller than your card front.
Make the base, mat and panel
Score the 8.5 x 5.5 in piece at 4.25 in and fold it in half so the fold is on the left. Cut the mat and the panel to the sizes above. Each layer is 1/4 in smaller than the one beneath it, which leaves an even 1/8 in (3 mm) border all around. Do not glue anything yet.
If either step gives you trouble, see the guides on how to cut cardstock cleanly and how to score and fold a card.
Cutting matching balloon shapes
A balloon is an oval that is slightly wider at the top than at the bottom. Drawn freehand, the left and right sides rarely agree. Cutting half the shape on a fold solves that, since both halves come from one cut.
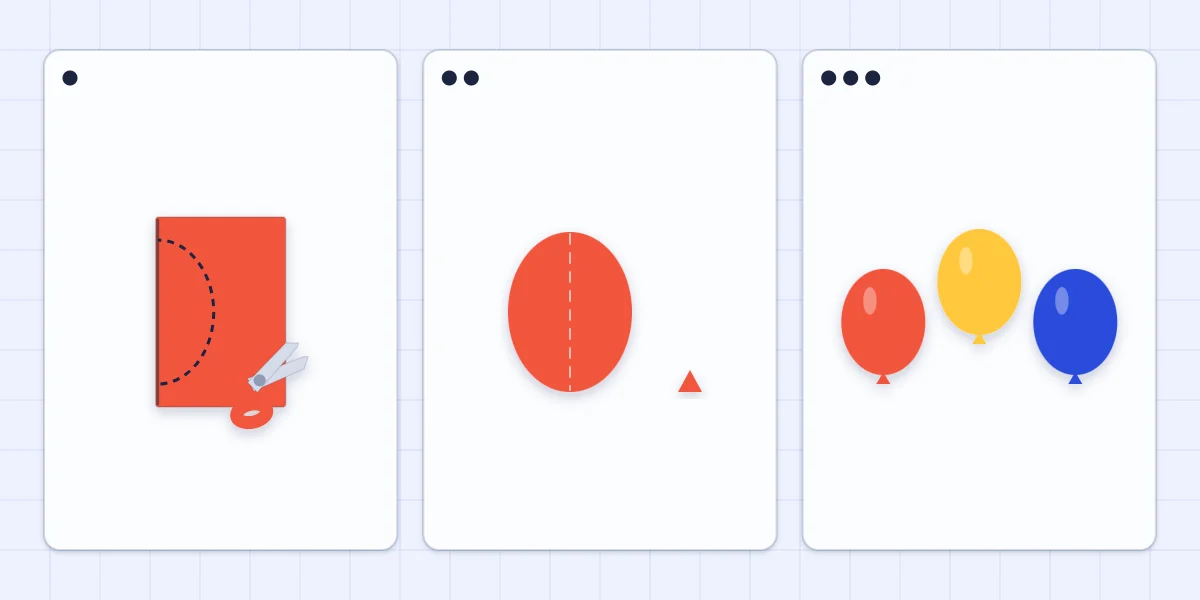
- Cut the template. Fold the scrap of printer paper in half. Starting and ending on the fold, draw half an oval about 1.5 in (3.8 cm) tall that reaches about 5/8 in (1.6 cm) out from the fold. Cut along the line through both layers.
- Unfold and add a knot. Open the paper to get a symmetrical oval about 1.25 in (3.2 cm) wide. Flatten the crease. For the knot, cut a triangle about 1/4 in (6 mm) wide from a colored scrap.
- Trace and cut three balloons. Trace the template on the back of each colored scrap in pencil and cut just inside the line. Cut one knot in each color. You now have three balloons, in red, yellow and blue.
Cut with long, smooth strokes and turn the paper rather than the scissors, since short snips leave a faceted edge. Supervise children with scissors.
Assemble the card
- Arrange the balloons dry. Lay them on the upper half of the panel at slightly different heights, with the middle one highest. Let the outer two overlap the middle one a little and tilt outward, as if the bunch were spreading. Keep at least 1/4 in (6 mm) of white between the balloons and the panel edges.
- Mark the gathering point. Make a light pencil dot in the center of the panel, about 1.25 in (3.2 cm) above the bottom edge. All three strings will end here.
- Draw the strings. Lift the balloons away one at a time, noting where the bottom of each sits, and draw a thin line from that spot to the dot with a fine-tip pen. A slightly curved line drawn in one movement looks more like string than a ruled one. Let the ink dry.
- Glue two balloons flat. Glue the middle balloon and one outer balloon directly to the panel. Tuck each knot under the bottom of its balloon, point up, so that only the wider end shows.
- Raise the third. Put two foam squares on the back of the last balloon and press it in place so it overlaps its neighbor. The shadow underneath gives the bunch depth. Glue its knot flat to the panel beneath it.
- Mount the layers. Glue the panel to the mat and the mat to the card front, checking that the borders are even before pressing down.
If you would rather not draw the strings, glue down thin thread or very narrow paper strips with a fine line of liquid glue.
Tip
Erase the pencil dot and any guide marks only after the pen lines are completely dry, or the ink will smear across the white panel.
For more on mats and borders, read the guide to layering cardstock. Raising pieces on foam, including homemade spacers, is covered in dimensional cards.
Choosing balloon colors
Three clearly different colors read as a cheerful bunch, and three shades of one color look calmer and more grown-up.
| Balloons | Mat | Effect |
|---|---|---|
| Red, yellow, blue | Mint | Bright and classic, good for children |
| Pink, red, yellow | Pink | Warm and soft |
| Three shades of blue | Navy | Calm, suits adults |
| White only | None, kraft base | Simple and modern |
Variations
The same template stretches into several other cards.
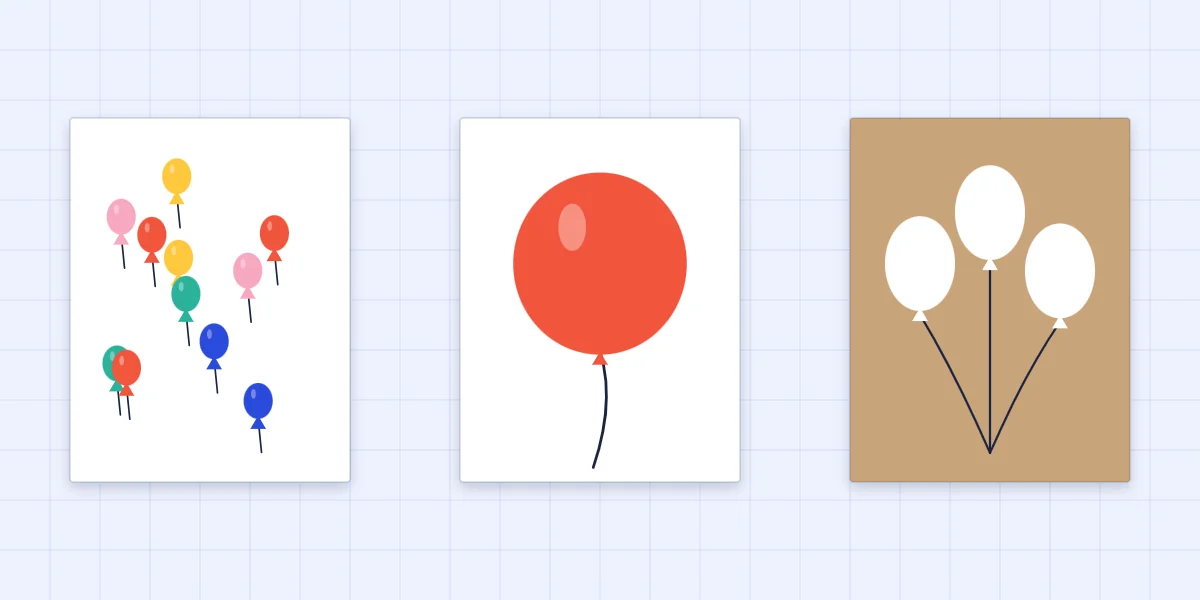
- Many small balloons. Cut a smaller template, about 3/4 in (2 cm) tall, and scatter eight to ten balloons floating upward across the panel, each with its own short string. Let one or two run off the top edge and trim them flush.
- One giant balloon. Cut a single balloon about 3 in (7.5 cm) tall so it fills the front, raise it on foam at the top, bottom and middle, and give it one long string.
- Balloons on kraft. Skip the mat and panel. Glue three white balloons straight onto a kraft card base and draw the strings in white or navy pen.
Adding the greeting
Write the greeting by hand in the clear space below the gathering point. Pencil it lightly first to check that it fits and sits level, go over it with the pen, and erase the pencil once the ink is dry. Longer messages belong inside.
Once the balloons feel easy, the layered birthday cake card uses the same cutting and layering on a slightly bigger build, and the same card base works for a congratulations card with a paper starburst.
Frequently asked questions
How do I cut paper balloons that are all the same shape?
Fold a scrap of thin paper in half, draw half an oval against the fold and cut through both layers. Unfolded, it gives a symmetrical balloon you can trace as many times as you need. Cut just inside the pencil line so no marks remain.
What can I use for balloon strings on a card?
A thin line drawn with a fine-tip pen is the simplest option and lies completely flat. Thin thread or very narrow paper strips also work: run a fine line of liquid glue with a toothpick and lay the thread on top.
Where should the greeting go on a balloon card?
Leave the lower part of the panel clear, below the point where the strings meet, and write a short greeting there by hand. Pencil it first, then go over it in pen. Longer messages fit better inside the card.