Congratulations Card With a Paper Starburst
Thin paper rays fan out from one point and a raised star covers the spot where they meet. One scrap-friendly design for graduations, new jobs, new homes and exams.

Tutorial at a glance
Materials
- White card base, 8.5 x 5.5 in (21.6 x 14 cm)
- Navy cardstock mat, 4 x 5.25 in (10.2 x 13.3 cm)
- White cardstock panel, 3.75 x 5 in (9.5 x 12.7 cm)
- Cardstock scraps in yellow, cobalt and pink
- Scissors, pencil and ruler
- Glue stick or liquid glue
- Foam squares or a stack of scrap cardstock
A congratulations card has to work for very different news: a graduation, a new job, a first home, a passed exam. A paper starburst handles all of them. Thin rays fan out from one point low on the card, a single large star sits over the point where they meet, and the whole front reads as “well done” before anyone opens it.
The front carries no words; the greeting is handwritten inside. The design is built almost entirely from scraps. Each ray is a long, narrow triangle, so offcuts too thin for anything else are exactly what you want. The rays are glued long and trimmed afterward, which means none of them has to be cut to an exact length.
What you need
- One A2 card base in white: 8.5 x 5.5 in (21.6 x 14 cm), scored and folded to 4.25 x 5.5 in (10.8 x 14 cm)
- Navy cardstock for the mat, 4 x 5.25 in (10.2 x 13.3 cm)
- White cardstock for the panel, 3.75 x 5 in (9.5 x 12.7 cm)
- Scraps of lighter cardstock in three colors, such as yellow, cobalt and pink
- A yellow scrap about 2 in (5 cm) square for the star
- Scissors, a pencil and a ruler; a craft knife and cutting mat are optional
- A glue stick or liquid glue, and two or three foam squares
Half a US letter sheet makes the base. If you work with A4 paper, half a sheet gives a very similar card, and the mat and panel shrink to match. For help with the straight cuts, see the guide on cutting cardstock cleanly.
Cutting the rays
Each ray is a triangle about 5 in (12.7 cm) long and between 1/4 and 1/2 in (6 to 13 mm) wide at its wide end, narrowing to a point. The quick way to make them is to cut a strip of scrap 5 in (12.7 cm) tall and then cut across it in a zigzag: one slanted cut, then a cut slanting the other way, and so on. Every cut finishes one triangle and starts the next, so nothing is wasted.
Cut about five rays in each color, fifteen in all. Vary the widths on purpose, since fifteen identical rays can look mechanical.
| Piece | Suggested size | How many |
|---|---|---|
| Rays | About 5 in (12.7 cm) long, 1/4 to 1/2 in (6 to 13 mm) at the wide end | About 15, in three colors |
| Star | About 1.75 in (4.5 cm) across | 1 |
| Confetti dots (variation) | About 1/4 in (6 mm) across | 20 to 30 |
Building the starburst
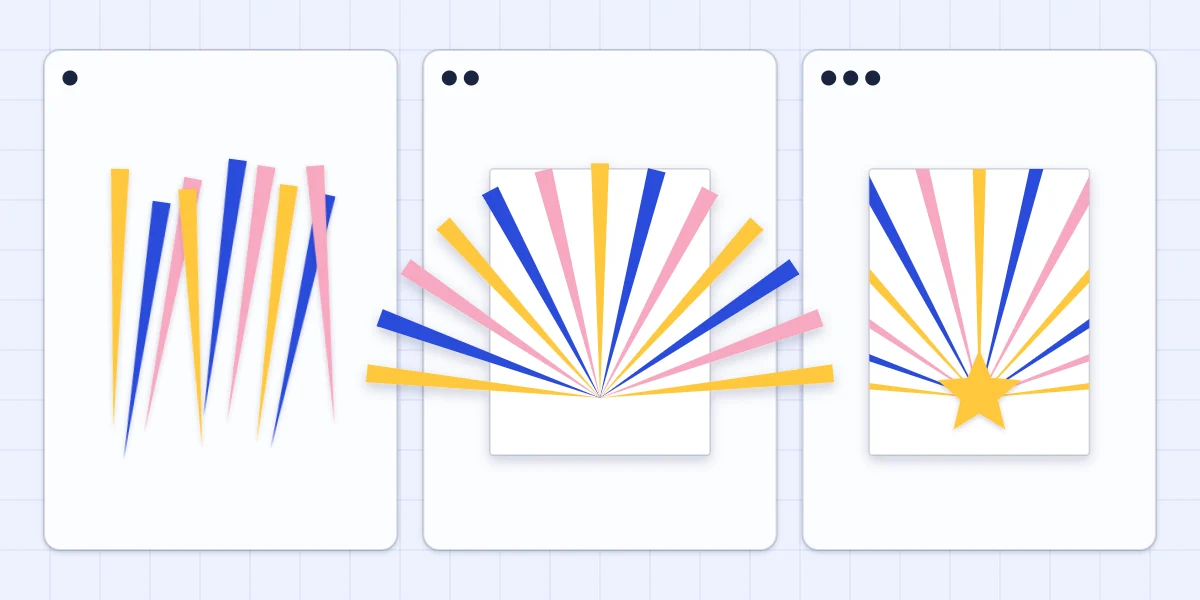
- Mark the center point. On the white panel, make a small pencil dot halfway across and about 1 in (2.5 cm) up from the bottom edge. Every ray will point at this dot.
- Arrange the rays dry. Lay the rays out with their narrow tips at the dot and their wide ends fanning out across the top and sides of the panel. Alternate the three colors and leave slivers of white between rays. The wide ends should hang over the panel edges.
- Glue from the middle outward. Start with the ray that points straight up, then work down each side in turn. Put glue on the whole back of each ray, right to the tip, but only as far as the panel edge. Glue on the overhang just sticks to your work surface.
- Trim the overhang. When the glue has set, turn the panel face down and cut along its edges with scissors, or with a craft knife and ruler on a cutting mat. Cutting from the back lets you follow the panel edge exactly.
- Add the star. The tips of the rays never meet in a perfectly tidy point, and they do not need to. The star goes right over the center dot and covers the crowded tips.
Making the star
A folded-paper template gives a star with matching sides. Fold a scrap of plain paper in half and draw half a star against the fold: half of the top point on the fold, one full arm pointing sideways, and one leg pointing down. Cut it out, unfold it, and trace around it on yellow cardstock.
The other route is a five-point guide. Draw a circle about 1.75 in (4.5 cm) across by tracing a small jar lid, mark five evenly spaced dots around it, and join each dot to the two dots opposite with a ruler. Cut along the outer outline only.
Mount the star on foam squares so it casts a small shadow over the flat rays. A small stack of glued cardstock scraps works as a spacer if you have no foam. The guide to raised layers and foam adhesive has more on getting height without bulk.
Assembling the card
Glue the trimmed panel to the navy mat, checking that the border is even on all four sides, then glue the mat to the card front. The dark mat matters here: it frames the white panel and makes the yellow rays stand out. More on choosing and sizing mats is in the guide to layering cardstock.
The corner confetti variation
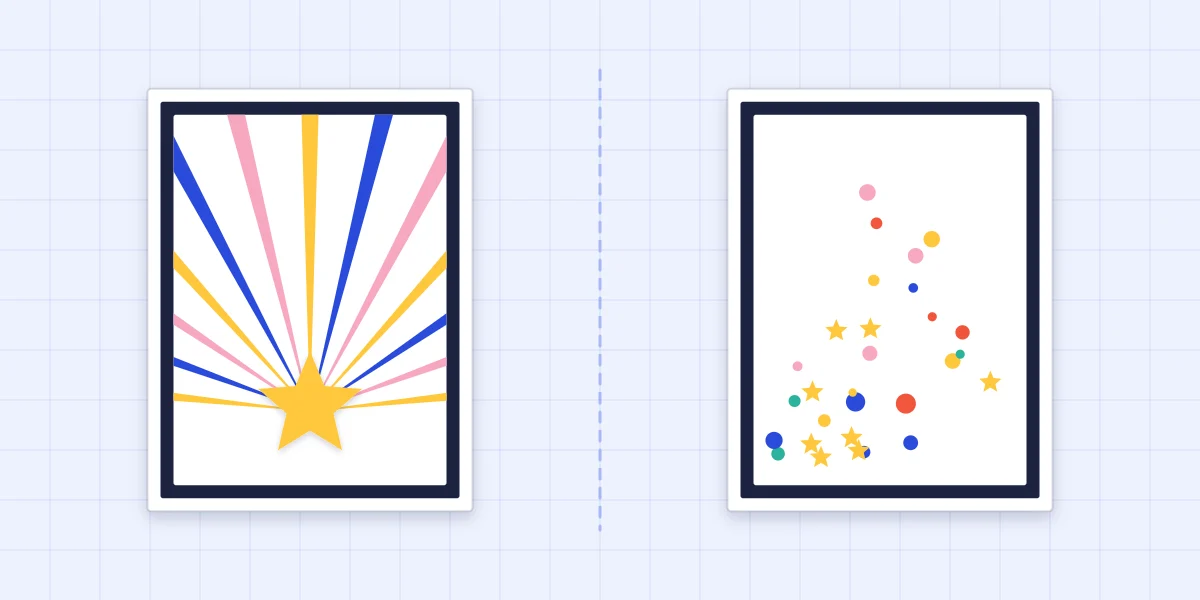
For a lighter version, skip the rays. Start at the lower-left corner of the panel and scatter small paper dots and tiny stars diagonally toward the upper right, packed closely near the corner and spaced farther apart as they travel. A hole punch makes the dots; without one, cut small squares and round the corners.
Keep to the same three colors so the two cards look related. The upper left and lower right stay clear, which gives this version room for a short handwritten line on the front.
One design, many occasions
Because the message lives inside, the card adapts by color alone. School or team colors suit a graduation, calm blues with one bright accent suit a new job, and warm yellows and pinks suit a new home. Write the greeting in pencil first, then go over it with a fine-tip pen.
Watch out
A craft knife is an adult tool. Cut on a cutting mat with the blade moving away from the hand that holds the ruler.
A raised star makes the card slightly thicker than a flat one. If it is going in the mail, a handmade envelope cut a little generously keeps the star from being squashed. Thick or rigid cards can cost more to send, so check with the postal service.
For an occasion that calls for something quieter than a starburst, the anniversary-style card with interlocking hearts uses the same folded-paper cutting trick.
Frequently asked questions
How many rays does a starburst card need?
About fifteen rays fill an A2 panel with narrow white gaps between them. Use fewer, wider rays for a bolder look or more slim ones for a finer burst. Lay them out dry first so you can see the spacing before any glue goes down.
How do I cut a paper star without a punch or template?
Fold a scrap of plain paper in half and draw half a star against the fold, then cut and unfold it. Both sides match because they were cut together. Trace that shape onto cardstock and reuse it for later cards.
Where does the greeting go on a starburst card?
The rays fill most of the front, so the greeting is handwritten inside the card. The corner confetti variation leaves open space on the front if you prefer a short line there.